











Lootbound
 (Пока оценок нет)
 Loading...
Similar Games











Description
What happens in Lootbound when the hero and two companions all want the last open cell on the grid? That question is the whole game, and it comes back in every room of every run.
| Genre | Tactical roguelite |
| Combat | Turn-based |
| Party | Hero plus companions recruited mid-run |
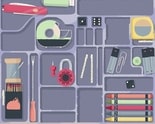
| Twist | Grid inventory with item auras |
Every Run Starts Alone in Lootbound
You begin each run as the hero, with no party at all. As you move across a branching map, you choose routes that lead to loot, dice rooms, and companions who join you along the way. Choosing between a safer road and a richer one is the first decision of every run, and it never stops being tense.
In combat you control only the hero. Companions act on their own and already know what to do, which means your real power comes from how you equip them rather than how you steer them. Every gear choice you make for a companion is effectively a set of standing orders.
Early in the game that is a shock for players used to commanding every unit. Tactics fans usually adapt after a run or two, once they realize the party is a build and not a squad to micromanage.
Grid Rules: Open Cells, Rotation, and Item Auras
Items do not have fixed slots. You rotate them and place them on the grid wherever there is space, and the hero and each companion need their own separate set of equipment. Rotation matters more than it sounds, because an awkward shape can decide whether a whole aura layout fits.
The deeper layer is item auras. Some items strengthen weapons or armor in adjacent cells, so moving a single item one cell over can change the entire build.
Puzzle-minded players will love this, because the best builds come from shuffling rather than chasing the biggest numbers. Just as often, the answer to a stuck run is a rotated armor piece instead of a rarer drop.
Damage Types, Armor, and Planning Fights Before They Start
The game features multiple damage types that interact differently with enemy armor and health. That lets you build around armor penetration, attrition, armor destruction, or direct damage instead of stacking a single stat.
Turn-based combat rewards planning: positioning, item use, and timing matter as much as raw stats. A fight you lose was usually lost when you equipped the wrong damage type, not when you clicked the wrong button. Small equipment swaps before a fight are cheap compared with losing a turn mid-battle.
Big single hits look best early on, while attrition and armor tools quietly win the long fights. Reading how a foe is protected before you commit to a weapon saves more runs than any lucky drop.
Dice Rooms, Boss Parts, and the Shape of a Run
Some rewards cannot simply be taken. Dice rooms offer several options at different difficulty levels, and the more valuable the reward, the harder the roll. Bad luck means moving on with consequences, which is where the risk in risk and reward comes from. Greed is the classic trap, because the top reward at the hardest roll is thrilling until a failed roll sends you into the next biome short of what you needed.
At the end of each biome you pick one of two boss parts, and each part changes the Guardian’s look and power. After every biome is cleared, you face the final Guardian you assembled.
A typical run flows like this:
- Start alone and choose a route on the map.
- Recruit companions and equip each one.
- Clear a biome and pick one of two boss parts.
- Repeat until every biome is done.
- Face the final Guardian you built.
Where Beginners Lose Runs and What Players Argue About
New players often spend everything on the hero and leave companions half-equipped, then wonder why fights collapse. Because companions act on their own, an under-geared ally is a hole in the build. Fixing that gap early is the cheapest way to save a run.
Another common mistake is hoarding cells for future loot instead of using the grid well right now. Once a boss part choice arrives, a cramped grid limits your options.
Difficulty is the argument that never ends. Reviews land in the mostly positive range, with fans loving the build depth and others frustrated by randomness and a steep learning curve. That split is likely to continue for as long as the grid punishes careless placement.
Advanced Builds That Reward One-Cell Moves in Lootbound
Once you understand auras, start building around a single damage type. Put items that share an aura next to the weapon that benefits, and give companions gear that complements the hero rather than copying it.
Compare builds across biomes. A setup that shreds armor in one biome may stall in another, so keep a second damage type in reserve. Rotating one item to sit beside a different weapon can beat swapping in a rarer piece of gear.
Achievement hunters tend to find these tricks first, because they replay the same routes with tiny grid changes. Those small experiments are how a decent build becomes a reliable one.
Lootbound turns every run into a puzzle with teeth. One rotated weapon, one aura placed a cell too far, or one boss part chosen for the wrong Guardian can separate a triumphant final fight from a quiet walk back to the map.