













Kaizo Knight

 (3 оценок, среднее: 3.00 из 5)
 Loading...
Similar Games










Description
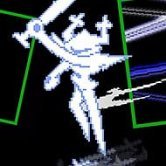
You walk into the Chapter 3 boss fight with Kris, Susie, and Ralsei lined up, expecting the silent Roaring Knight you already know. The Knight speaks first. Its colors are different, its attacks are not the ones you rehearsed, and the pressure builds from the first turn. Kaizo Knight takes the final encounter of Deltarune Chapter 3 and rebuilds it for players who already know the original fight and want something less forgiving.
| Type | Deltarune difficulty mod, one reworked boss fight |
| Boss | The Roaring Knight, Chapter 3 |
| Party | Kris, Susie, and Ralsei |
| Key attacks | Sword Tunnel, Star Storm, Box Splitter |
| Routes | Normal Route and Weird Route versions |
| Practice | Dedicated practice mode for single patterns |
| Reward | RadiantShard for defeating the modified boss |
| Structure | One encounter, no numbered stages |
What Kaizo Knight Changes in the Chapter 3 Boss Fight
The base Roaring Knight fight cycles through five attacks per phase across its first three phases, and a patient player learns that rhythm within a few attempts. This mod keeps the setting and the turn-based structure, then rebuilds the bullet-board half of every round. You get faster and denser sequences, harder versions of existing sword formations, horizontal strikes, combined patterns, and a revised final phase. Several attacks come from unused or expanded ideas, which is why veterans of the original fight often feel their muscle memory betray them.
The Knight also behaves differently around your party. In this version it talks through the battle instead of staying mute, and it reacts to what you do. Edit your stats to cheat and it slashes them back to vanilla values. Eventually it reaches for your TP bar too.
There is no new campaign and no new area to explore. The story context stays the same: the party faces the Knight tied to the creation of Dark Fountains. Everything that is new lives inside one boss fight, so the whole game of it comes down to preparation and execution.
Sword Tunnel, Star Storm, and Box Splitter Explained
Three attack families define the fight, and each asks for a different kind of movement. Learning to tell them apart in the first second matters more than reaction speed. Once you recognize the shape, you can pick a safe lane before the pattern fully fills the board.
- Sword Tunnel sequences restrict your movement into narrow corridors, so committing to the wrong side early gets punished.
- Star Storm attacks send multiple projectiles from several directions, which rewards small, calm adjustments over big dodges.
- Box Splitter patterns change the available space, shrinking the area where your SOUL can survive.
Players who enjoy reading patterns tend to like Sword Tunnel the most, because the safe route is always there if you find it. Players who panic under pressure usually struggle more with Box Splitter, since the board itself seems to move against them.
Grazing bullets generates TP, and TP funds your party’s abilities. Greedy grazing is a classic way to lose a run, so many players only graze when the path is already clear.
Turn Pacing: Why Hesitation Costs You
Surviving is not enough. You also have to damage the Knight to reach the final attack sequence, so waiting through enemy phases does nothing except prolong the fight. Every turn must be split between defense, healing, TP management, and offense. Ralsei’s Heal Prayer keeps allies standing, and Susie’s Rude Buster handles burst damage, but neither helps if you run out of turns to use them.
Timing matters because the Knight can block attacks that fail to land a critical hit. That means sloppy offense wastes a turn without moving the fight forward. Drag the battle out and you also meet harder attack variations, so efficiency directly lowers the number of dangerous patterns you face.
This is the part players argue about most. Some love that the fight punishes slow play, while others feel it removes breathing room. Either reading is fair.
Practice Mode, Normal Route, and Weird Route in Kaizo Knight
The mod offers different versions of the encounter for the Normal Route and the Weird Route. Some attacks arrive in changed arrangements, and your equipment can shape your approach. The Normal Route is the usual baseline for guides, while the Weird Route appeals to players who want to see more of the Knight’s reactions.
- Open practice mode and isolate one pattern instead of replaying the whole fight.
- Watch where the safe gaps appear before you try to dodge anything.
- Repeat the same attack until your movement route feels automatic.
- Return to the full fight and test whether you can chain the pattern into the next turn.
Practice mode saves the most time late in the fight, once the final phase turns every mistake into a full restart. Story-minded players often skip it at first, then come back after a few frustrating losses. Players chasing a no-hit clear use it constantly.
Where Players Disagree About the Difficulty
Opinions split sharply. One forum poster said only the second attack gave them real trouble. Another player posted about a fourth straight day of attempts. Both experiences are plausible, because your party setup and patience change the fight enormously. A nerfed variant also exists that keeps the same battle but lowers the damage the Knight deals.
Some players see that variant as a fair practice option. Others think it misses the point of a mod built around kaizo-style punishment. The honest view is that the fight leaves few safe moments to recover, so a bad streak can undo careful planning.
Many players describe a flow state after enough attempts, where dodging stops being calculation and becomes muscle memory. That feeling usually arrives well after the first win seems possible.
Common Questions About Kaizo Knight
Is Kaizo Knight harder than the original Roaring Knight fight?
Yes. It adds new attack combinations, harder versions of Sword Tunnel and Star Storm, and a revised final phase, so memorizing the base five-attack cycle no longer helps. Players still disagree about which attack is hardest.
Do you have to deal damage to finish the fight?
Yes. Surviving alone never ends the encounter, because you must reduce the Knight’s health enough to trigger the final sequence. Taking too many turns also brings harder attack variations, so efficient offense and healing both matter.
Is there a way to practice single attacks?
Yes. The practice mode lets you repeat individual patterns such as Box Splitter without replaying the whole battle. Players use it to learn movement routes before attempting a full clear and the RadiantShard reward.
Kaizo Knight is for players who beat the Roaring Knight and wanted the fight to push back. Learn the Sword Tunnel lanes in practice mode, spend your TP on Heal Prayer and Rude Buster with intent, and treat every turn as something you cannot afford to waste.